Thermal paste, also known as thermal compound or thermal grease, plays a crucial role in cooling your CPU. Over time, this paste can dry out or lose its efficiency, leading to overheating and potential hardware failure. Knowing how to properly remove and replace thermal paste is essential for maintaining the longevity and performance of your computer. This guide will walk you through the step-by-step process to ensure your CPU stays cool and functions optimally.
Why Is Thermal Paste Important?
The primary function of thermal paste is to fill in microscopic gaps between the CPU and the heatsink. These gaps, if left unfilled, can trap air and significantly reduce the cooling efficiency. A thin, even layer of thermal paste ensures optimal heat transfer from the CPU to the heatsink, thereby keeping the CPU temperature in check.
Tools and Supplies Needed
- Isopropyl alcohol (at least 90%)
- Lint-free cloth or paper towel
- Plastic spatula or flat-edged tool
- New thermal paste
- Thermal paste applicator (optional)
- Microfiber cloth
Before you start the process, make sure you have all the necessary tools and supplies. Using high-quality materials will ensure that you achieve the best results.
Step-by-Step Guide to Remove and Replace Thermal Paste
Step 1: Power Down and Disconnect
First, make sure your computer is powered down completely and disconnected from any power source. This ensures your safety and prevents any potential damage to the components.
Step 2: Remove the Heatsink
Open your computer case and locate the CPU heatsink. Typically, the heatsink is secured to the motherboard with screws or a locking mechanism. Carefully remove the heatsink by unscrewing or unlocking it, depending on your specific setup.
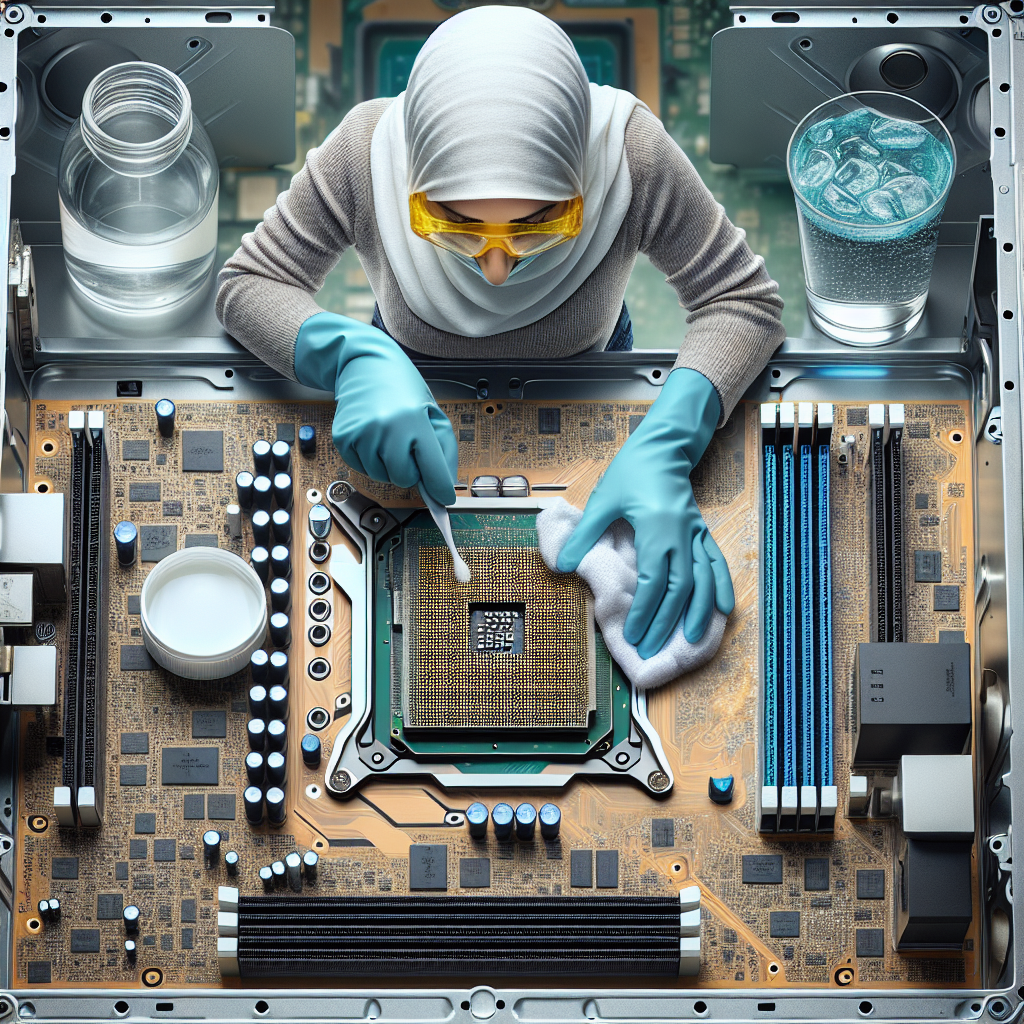
Step 3: Clean the Old Thermal Paste
Use the lint-free cloth or paper towel to gently wipe off the old thermal paste from both the CPU and the heatsink. Be careful not to scratch or damage the surfaces. Once the bulk of the paste is removed, dab a small amount of isopropyl alcohol onto a clean section of the cloth and wipe the surfaces again until they are clean and free of residue.
| Step | Description |
|---|---|
| Power Down | Ensure the computer is off and unplugged. |
| Remove Heatsink | Detach the heatsink from the CPU. |
| Clean Old Paste | Wipe off old thermal paste with lint-free cloth and isopropyl alcohol. |
| Apply New Paste | Apply a small amount of new thermal paste to the CPU. |
| Reattach Heatsink | Secure the heatsink back onto the CPU. |
Step 4: Apply New Thermal Paste
Once both surfaces are clean and dry, it’s time to apply the new thermal paste. Squeeze out a small amount of thermal paste onto the center of the CPU. You can use the provided applicator or a plastic spatula to spread the paste evenly over the surface. Make sure to apply a thin, even layer to avoid excessive build-up, which could hinder heat transfer.
Step 5: Reattach the Heatsink
Carefully place the heatsink back onto the CPU, ensuring that it is properly aligned. Re-secure it with screws or the locking mechanism, applying even pressure to avoid any damage. Make sure the heatsink is firmly attached to maintain good contact with the CPU.
Step 6: Reconnect and Power Up
After reattaching the heatsink, close your computer case and reconnect it to the power source. Power up your computer and monitor the CPU temperature to ensure that it is operating within normal ranges. You can use software tools like HWMonitor or Core Temp to check the temperatures.
Tips for Applying Thermal Paste
- Less is More: Applying too much thermal paste can be counterproductive. A pea-sized amount is usually sufficient.
- Even Spread: Ensure the thermal paste is spread evenly to avoid air pockets and uneven heat distribution.
- Quality Matters: Invest in high-quality thermal paste for better thermal conductivity and longevity.
Conclusion
Replacing thermal paste is a straightforward yet essential maintenance task for anyone looking to keep their computer in top shape. By following these steps, you can ensure that your CPU remains cool and efficient, thereby prolonging the life of your machine. Regularly checking and replacing thermal paste can prevent overheating and safeguard your hardware from potential damage.